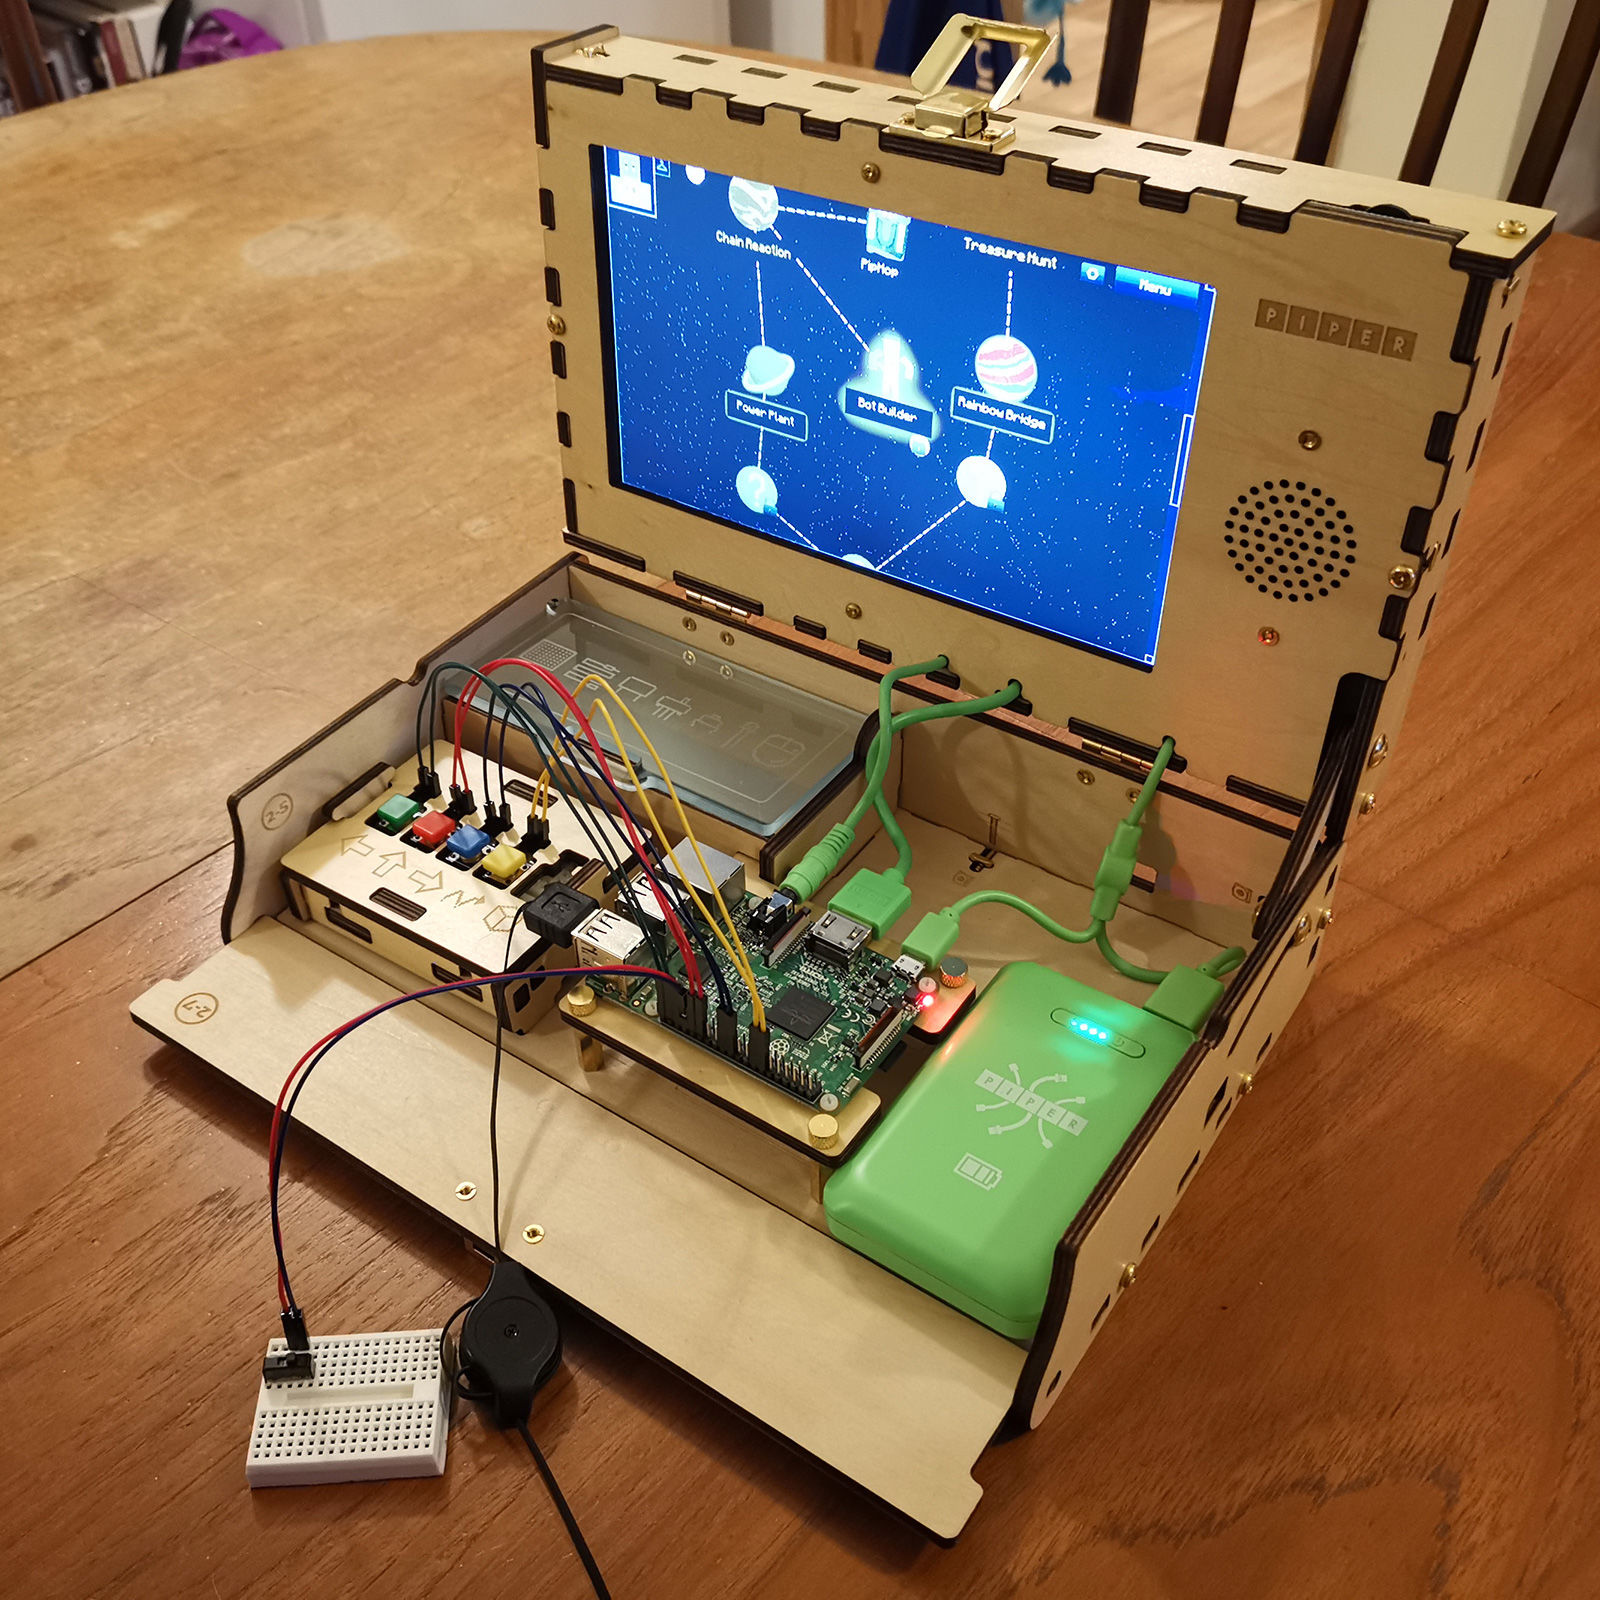
I tested the Piper with my 8-year-old daughter A over the course of a month, who as you’d expect did most of the work on Piper, with me watching over her shoulder, helping her if she got stuck and providing context around some of the tasks she was performing (more on this later). Unusually for an electronics-focused product, the first thing your child encounters when they open the Piper box and is a stack of laser-cut wooden pieces. These are the components that make up Piper’s chassis, which they build into a laptop-like shell and then slot the screen, customised Rasperry Pi ‘brain’ and controls into. Alongside the wooden pieces, there are a lot of separate cardboard boxes containing the electronic components. Each is clearly labeled – as are the wood – and, combined with a clear, visual set of instructions, Piper’s creators deserve a lot of credit for how easy they’ve made comprehension of the steps you follow to build the computer itself. A is at the bottom of Piper’s suggested age range, but had no problem following along. The only downside to the instructions is that they are printed on one side of an A2 sheet of paper, with the steps running anti-clockwise around a component list in the centre. This is great to give you an easy overview of the whole process and works well if you pin it to a board or wall over a desk or workbench. On our dining room table though, it just kept getting in the way. Building the wooden chassis is just a matter of clipping and screwing the parts together following those simple-to-understand instructions. Then your child pushes, clips and screws the electronic components – the screen, speaker components (including the amplifier (below), ‘brain’, control board and battery – together. This proved no challenge to A – whose little fingers found popping screws into small places a lot easier than mine would have – and we had the complete ‘laptop’ built in around an hour. The end result looks has a real hand-made feel that’s more appealing than most clip-together learning systems and A found a real sense of achievement in having built the computer herself – and it feels like she has a greater sense of ownership – which may have made her warm to using Piper if telling her she could play Minecraft on it hadn’t already made her very excited about using it. However, what other children will get out of this depends on their outlook: you may feel you are paying a premium with Piper for what is essentially a basic bit of woodworking. Clipping together and wiring the speaker can be educational if you as a parent use it as a chance to explain how speakers and ears work – but this isn’t part of Piper’s curriculum. The electronics underpinning both Piper’s physical elements are rarely explained in either its physical instructions or in the on-screen learning tools we’ve encountered in the weeks we’ve used it so far – leaving it up to you to explain to your child. This is likely for the best, as you can tailor how much detail about circuits, currents and resistance to the age and level of understanding of your child – but it’s worth being aware that even with older children this is an educational tool that requires your participation.
Learn coding through Minecraft
Those on-screen learning tools are really rather wonderful. Piper’s brain is a Raspberry Pi that has been programmed to automatically launch an app that feels like its own simplified OS that only has a few buttons to choose from (though you can go out the standard Pi OS if you want to move on to more complex programming using ). From this clear, welcoming environment you can follow a set of lessons or get creative – both using the Pi version of Minecraft as their bases. Head to the lessons and you enter a story about a robot, Piperbot, who’s trying to save the Earth from a giant asteroid heading towards it by completing a series of tasks in Minecraft worlds that require wiring together different components – buttons, switches, LEDs and the like – on breadboards and to and from spikes on the main Raspberry Pi board. For example, early on your child has to wire an LED to the breadboard and Pi to create a ‘treasure detector’ that helps them find treasure in a world, flashing more frequently the nearer Piperbot gets to the goal (using movement buttons also wired by your child, plus a mouse). Each segment is accompanied by a video showing the story and which components you need. When it’s time to wire parts together, your child moves Piperbot to a crafting table and interact with it (if your child has used Minecraft they’ll know how to do this, even if you don’t). This brings up a screen that shows a blocky version of the Pi, breadboard and components – showing them what to attach where, and indicating through flowing lights when they’ve done it correctly. Again, it’s up to you to explain what’s happening on an electrical level – but it’s a brilliantly thought-out and engaging way of explaining how to wire elements together than A found incredibly easy to comprehend. Your child progresses from world to world (below), unlocking new ‘levels’ as they go and gaining more knowledge of how to create more complex systems. Once you’ve completed the Story Mode, you can play each level in creative mode, or move over to PiperCode (below). This is a Scratch-like coding environment with very well written animation-led learning tools that take you step-by-step through a series of lessons. We’ve only just moved onto these lessons, so I’ll update this review with our thoughts on PiperCode when we’ve explored it further.
Verdict
The building experience and physical components are a great for making your child feel that Piper is something of value to them, something they’ve achieved – but its the Minecraft- and video-led learning experiences that really make Piper stand out over the likes of Kanu. And it would be wonderful if this was available to parents with shallower pockets. Neil is head of product at IDG. Previously he spent 20 years editing Tech Advisor’s sister site Digital Arts, so knows a thing or two about design.