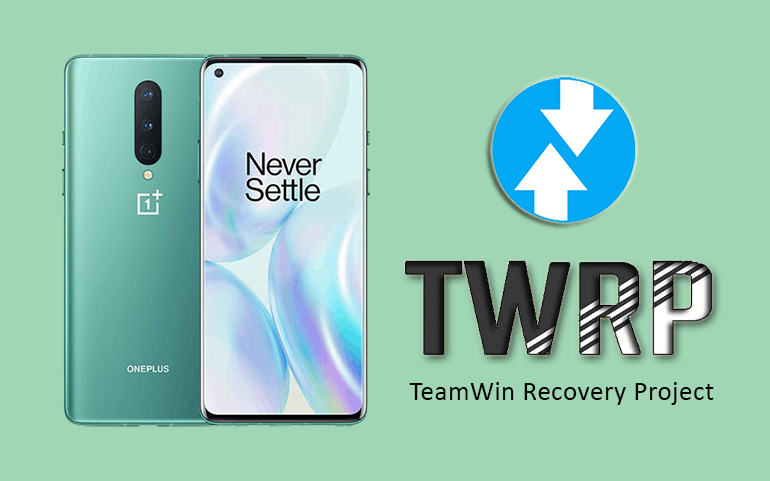
Most importantly, you can use TWRP recovery and install third-party custom ROMs, kernels, and mods like Magisk or Xposed. Additionally, you can even take Nandroid backup and restore, remove all bloatware, wipe Dalvik and cache partitions, overclock and underclock, etc. Furthermore, you can flash the CF-Auto-Root, SuperSU, or Magisk and easily root Android phones. These functions are not available in the default Android stock recovery. This is the main reason why TWRP is gaining a lot of critical acclaims and a huge user base. Since TWRP is an open-source project, it is quite simple for the developers to build an unofficial TWRP recovery. In this guide, we’ll install TWRP recovery on Samsung Galaxy M31 SM-M315F/DS smartphone. This is the latest handset from the Galaxy M series and is a successor to the earlier released Samsung Galaxy M30s. It is a mid-budget smartphone with the latest trending features. However, you can always experience your phone’s maximum potential by rooting and flashing recovery. But doing anything, we recommend our users to backup entire phone data. As mentioned before, there are many methods to install recovery. You can either install TWRP without PC using apps or flash TWRP using a PC and Odin tool. In this article, we’ll use ADB & fastboot commands as well as the Official TWRP app to install TWRP recovery on Galaxy M31.
How to install TWRP Recovery on Galaxy M31
In this tutorial, we’ll use two methods and flash the custom recovery. At first, we’ll apply the ADB and Fastboot commands. Besides, we’ll also use the Official TWRP app for doing the same.
Disclaimer
This process will void your phone’s warranty. Also, read and follow the steps carefully. A wrong move can damage or brick your phone. That won’t happen though if you implement our step-by-step guide correctly.
Requirements
After performing everything as given above, let’s begin the process to install TWRP recovery on Galaxy M31.
Method 1: ADB & fastboot
In the ADB and fastboot method, we’ll use a command prompt window on the PC. Moreover, with a few simple commands, we’ll install the custom recovery on your Samsung handset.
Downloads
ADB drivers TWRP.img
Steps to install TWRP Recovery on Galaxy M31
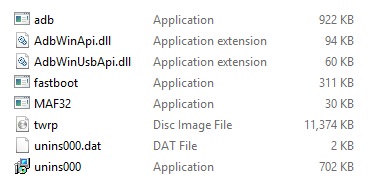
Install the ADB setup on your PC. Now, transfer the downloaded TWRP.img file to C:\Program Files\Minimal ADB and Fastboot folder (where you’ve installed the ADB drivers). You’ll see the below files in the ADB folder:
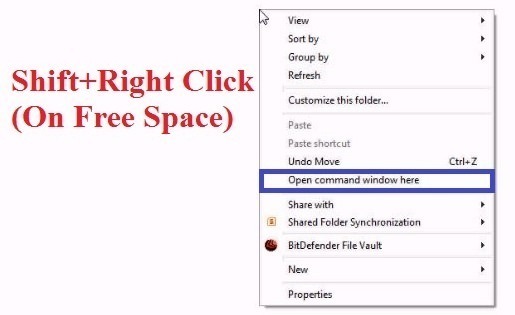
Using a standard USB cable, connect your phone to PC. Go to the ADB and Fastboot folder, hold the Shift button and right mouse click anywhere. You’ll see a list of options. Select the Open command window here option. This will launch a CMD window as shown below.
We’ll now enter commands one after another. At first, type the below command and press enter key:
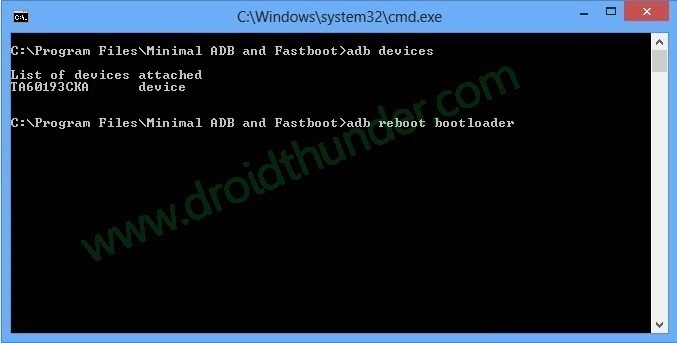
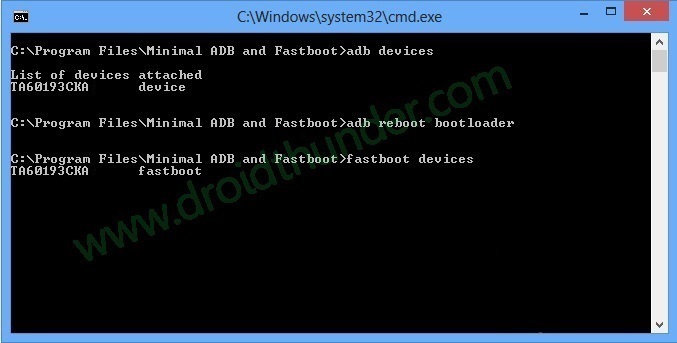
adb devices
As soon as you hit enter, a message saying ‘List of devices attached’ will appear. Besides, some random numbers and letters will also be shown. This will confirm that your phone is successfully recognized by the computer.
If such a thing doesn’t happen, then install Samsung USB drivers again. Unfortunately, if the problem persists, the refer our guide:
Furthermore, enter the below command to boot Galaxy M31 into fastboot mode.
adb reboot bootloader
This will restart your phone into fastboot mode. Note: Do NOT remove the USB cable until and unless the TWRP installation process completes. To confirm whether fastboot is functional or not, enter the command:
fastboot devices
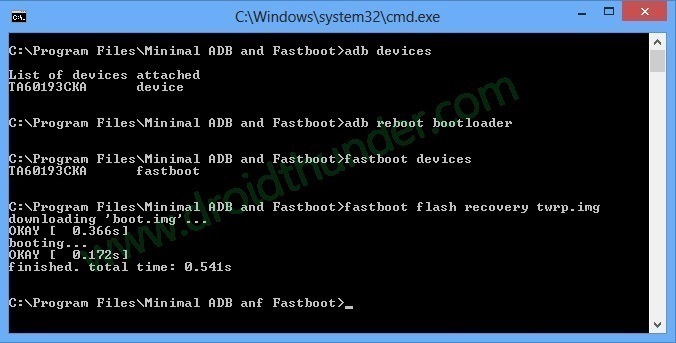
Some random numbers will confirm that fastboot is indeed functional. We’ll now install TWRP recovery on Galaxy M31. For that, type:
fastboot flash recovery twrp.img
This will begin the actual Samsung Galaxy M31 TWRP recovery flashing process. Finally! This is how you can install TWRP recovery on Galaxy M31 using ADB and Fastboot commands.
Method 2: Official TWRP App
If you find Method 1 as too complicated, then go for this one. Here, we’ll use the TWRP app and download an official custom recovery from the TeamWin servers. Later on, we’ll use the same app to install TWRP without PC. Let’s get straight into the guide now.
Downloads
TWRP App
Steps to install TWRP Recovery on Galaxy M31
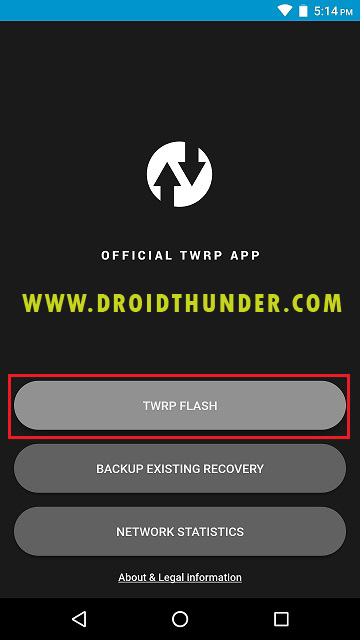
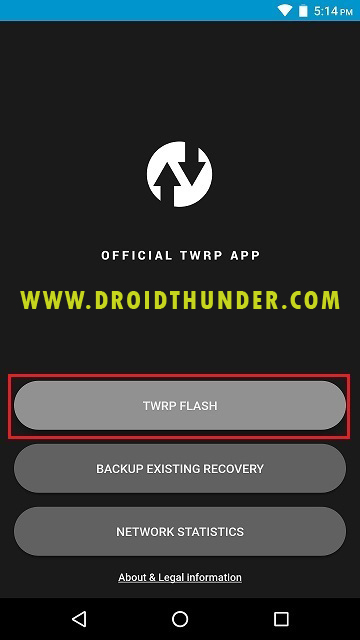
Download and install the official TWRP app from the above link. Open the application and tap on the TWRP flash option as shown below.
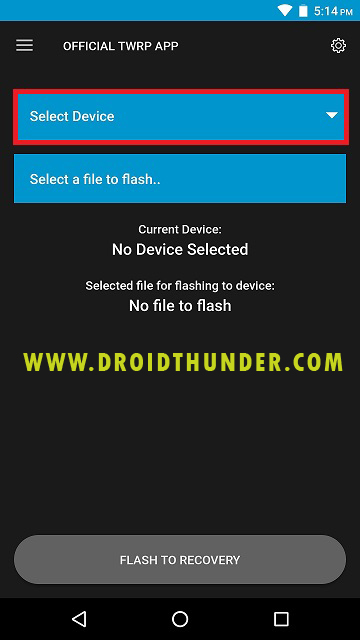
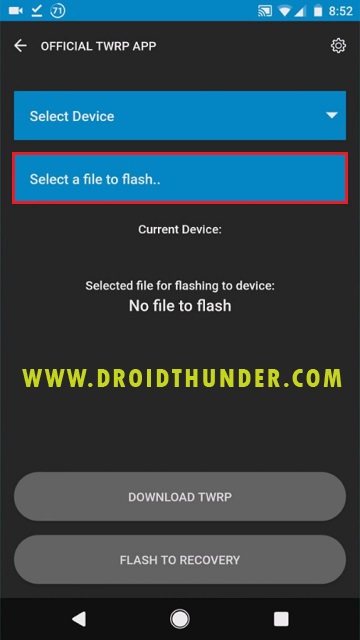
Now, click on the Select Device option.
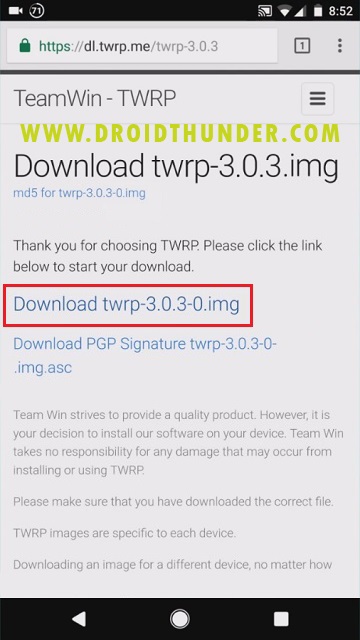
This will show a list of Android phones. Simply search for your mobile in the list and select it. After selecting your Android phone, you will be asked to choose a TWRP version from the list of twrp.img files. Select the topmost recovery. Because it will be the latest version. As soon as you select the TWRP file, you’ll be redirected to a browser.
In the browser, click on the download link to start the downloading process. Upon completion, go back to the Official TWRP app. Again click on the TWRP flash option from the main menu.
On the next screen, tap on Select a file to flash option.
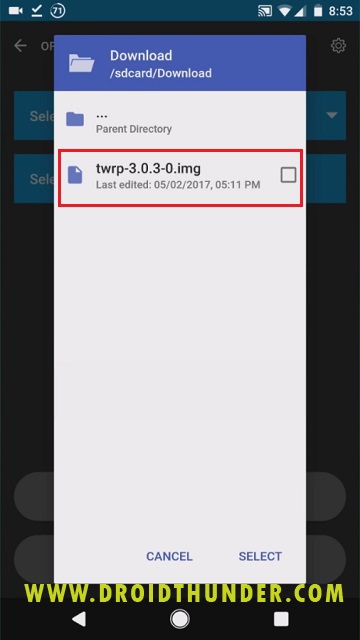
Now navigate to the downloaded TWRP.img file and select it.
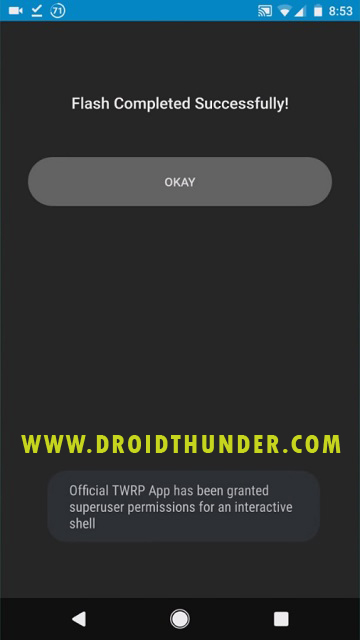
This will open the downloaded TWRP.img file in the app. Let’s start the TWRP recovery installation process now. For that, click on the Flash to Recovery option. Press okay to confirm it. This will start the process to install TWRP without PC. It will hardly last for a minute. Upon completion, a message saying Flash completed successfully! will appear.
Steps to boot Galaxy M31 into TWRP Recovery mode
There are two ways to enter the custom recovery mode. In the first method, we’ll use an Android app called Quick Reboot to automatically restart the phone into recovery. Whereas, in the second method, we’ll manually use the mobile keys (Hard Buttons) to do the same.
Method 1: Quick Reboot app
Download and install the Quick Reboot app. Launch the app and click on the Recovery option. Click on Yes to confirm. This will boot your phone into TWRP recovery mode.
Method 2: Using Buttons (Hard Keys)
Power off your phone. Press and hold the Volume up + Power button simultaneously. As soon as the TWRP logo appears, leave both the buttons. This will restart your device into TWRP recovery.
Conclusion
Finally! This is how you can install TWRP recovery on the Galaxy M31 SM-M315F/DS smartphone. If you have any queries related to this article, then feel free to comment below. Thank you! Notify me of follow-up comments by email. Notify me of new posts by email.
Δ