But what is a custom ROM? Is it safe? A custom is a customizable firmware based on Google’s Android source code. Yes, it is completely safe, as long as you’re installing the correct one. Since Android is an open-source project, it is quite easy to develop and build your own custom ROM. Some famous websites like the XDA developers provide free Android source code. This includes the entire Android operating system with UI, kernel, libraries, etc. Hence, anyone with a few technical skills and coding knowledge can create their own Android custom firmware. After developing the firmware, the next step is to install it on a compatible Android smartphone or tablet. For that, there are various custom recoveries like TWRP, CWM, Orange Fox, etc. Among these recoveries, TeamWin Recovery Project is the most preferred and used one. Because of this many Android OEMs launch the TWRP recovery for their respective smartphones. According to a recent survey, most Google Pixel and Nexus users try to get unofficial firmware on their handsets. The main reason behind this is that Google phones run a boring stock Android UI. In today’s guide, we’ll install a custom ROM with the help of TWRP custom recovery. This method will work on any Android smartphone and tablet running the latest version of recovery.
How to Flash Custom ROM using TWRP Recovery
Without wasting any time, let’s begin the installation process.
Disclaimer
This process will void your phone’s warranty and wipe off the data. Besides, you will no longer receive the official Stock firmware update. Moreover, flashing a custom ROM is a risky process. Your device might end up in a boot loop or bricked condition. That being said, we want to make you aware of the risks involved in installing custom firmware. If you still want to give it a try, then proceed to the instructions given below.
Warning
Make sure that you are flashing the correct custom ROM on your Android phone. Do NOT move ahead if the firmware is incompatible with your device model number.
Requirements
At first, charge your Android phone to a minimum of 50%. Since this process will delete your phone data, it is better to take a complete Android backup. Unlock your device bootloader before moving ahead. Also, enable USB debugging and OEM Unlock, and Advance reboot mode. Finally, root your Android phone and flash the latest TWRP Recovery.
Steps to Install Custom ROM using TWRP Recovery
Follow the step-by-step guide mentioned below.
1. Download Custom ROM on Android
Firstly, download the custom ROM zip package file on your mobile. Make sure to download the right firmware that is compatible with your device model number.
2. Boot Android phone into Recovery
Switch off your Android device. Now, restart it into TWRP recovery mode.
Every device has different ways to boot into recovery. You can either Google it or use the Recovery reboot app from Play Store.
3. Create Nandroid backup with TWRP
As soon as you land into recovery, take a Nandroid backup of your current system. This is important because if something goes wrong, you can easily restore the saved version.
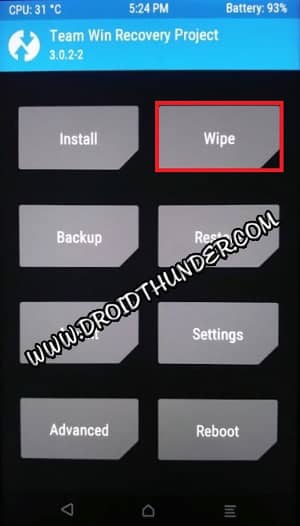
4. Wipe Data and Cache Partitions
Tap the Wipe button present on the main screen.
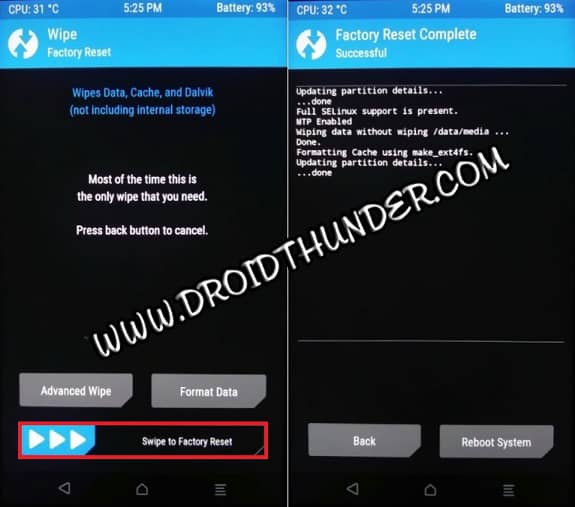
On the next screen, swipe right to begin the factory reset process.
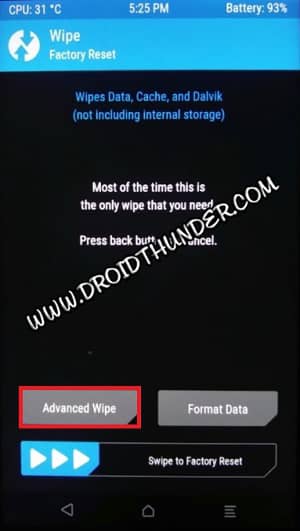
Note that this step will delete your entire phone data. Hence backup before doing it. Next, go back to the main screen and again press the Wipe button. This time click on the Advanced Wipe option.
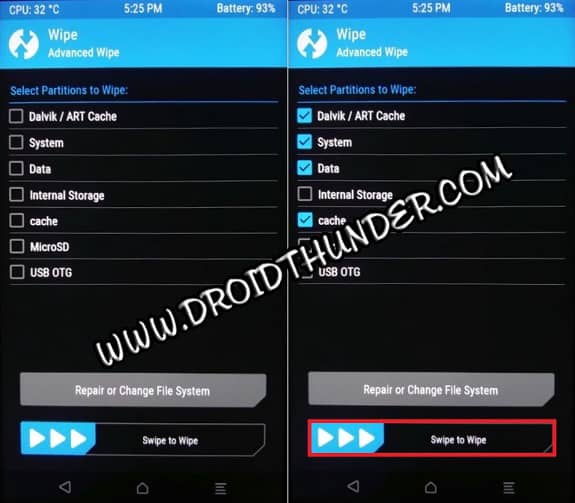
On the next screen, check the Dalvik/ART cache, System, Data, and cache partitions.
Finally, swipe right to start the partition wiping process.
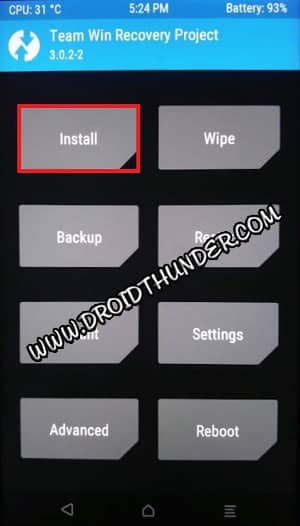
5. Install Custom ROM with TWRP
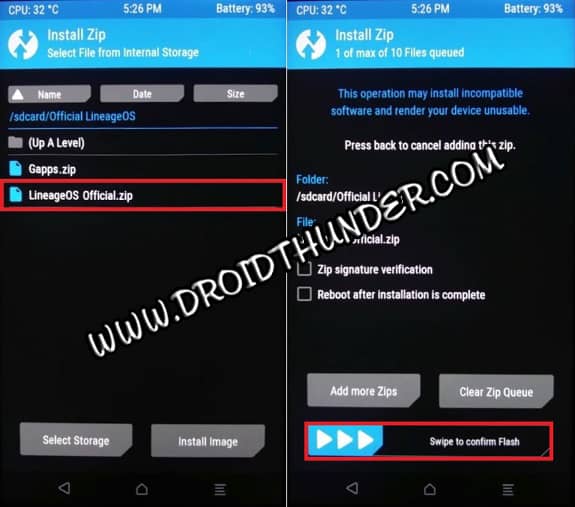
Let’s begin the actual Android ROM installation process. For doing so, click on the Install button and select the downloaded custom ROM zip package file.
Next, swipe right to confirm the flash.
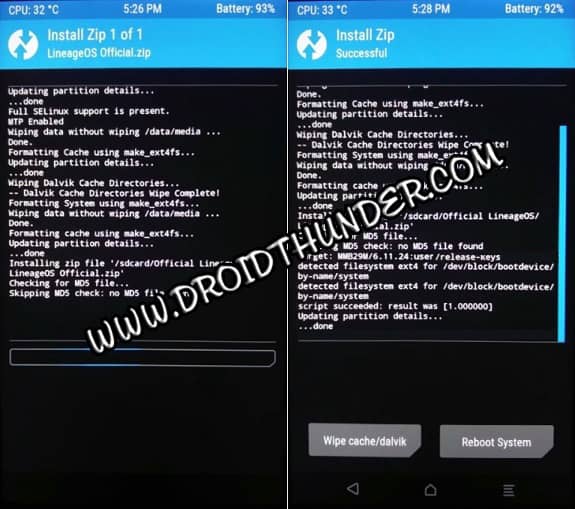
This will start the actual installation process.
6. Finishing the flashing process
The process will take a few minutes to complete successfully. As soon as it finishes, a successful message will appear in the recovery.
Similarly, you can install GApps (Google Apps) using TWRP.
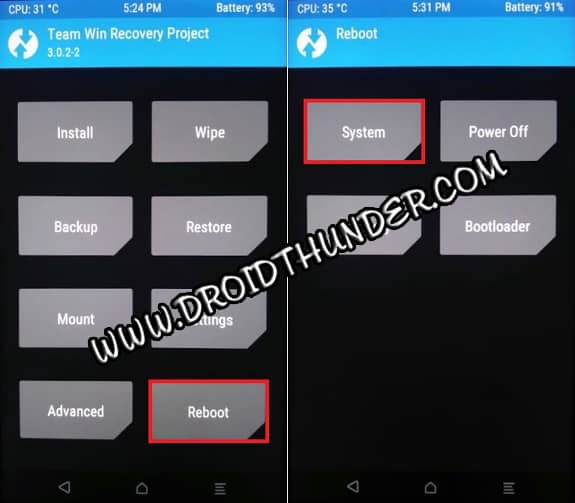
7. Restart your Android device
Navigate to the Reboot > System option and restart your phone.
In case, if you face the boot loop issue, just wipe data/cache partitions from the recovery. Besides, remember that the first boot will take more time to start than usual.
Conclusion
I hope that this simple guide gave you a complete idea of how to flash custom ROMs on any Android device via TWRP recovery. If you liked this post, then kindly share it on your social media platforms. Lastly, do comment below on any problems and suggestions. Thank you! Notify me of follow-up comments by email. Notify me of new posts by email.
Δ