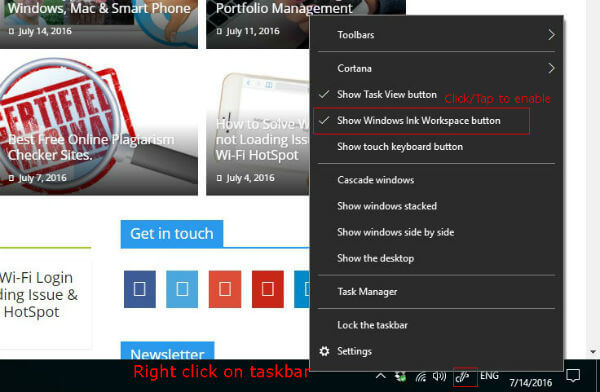
Though the main purpose of the Windows Ink Work Space is for hand drawings, Microsoft included an important feature that will help users to take screenshots that can be edited simultaneously. Windows Screen Sketch is the feature that will be coming to normal users along with the Anniversary update to take screen shots and highlight or edit the parts of it in the same window. Here we will see how we will use Windows Screen Sketch to take screen shots and the edit controls along with it. Windows Screen Sketch is actually the combination of two available features in previous Windows versions and Windows 10. First feature is taking screen shots that might be complicated or trickier in some devices and the Second feature is the highlighter options as given in the Microsoft Edge browser. With the Anniversary update of Windows 10, Microsoft is bringing these two features as Windows Screen Sketch under the newly introducing Windows Ink Work Space category. We need to enable the Windows Ink Work Space to begin with and it is very simple. The easiest way to enable the Windows Ink Work Space is to right click on the Task bar and we can see the “Show Windows Ink Work Space Button” option that we need to click to enable it. In the Touch based devices, we can use the long press on the Task bar to get the Right click menu, if already mapped for Right Click. Alternatively, we can also go to Settings->Personalization->Task bar and under Notification Area, we can see the option Turn System icons ON or OFF.
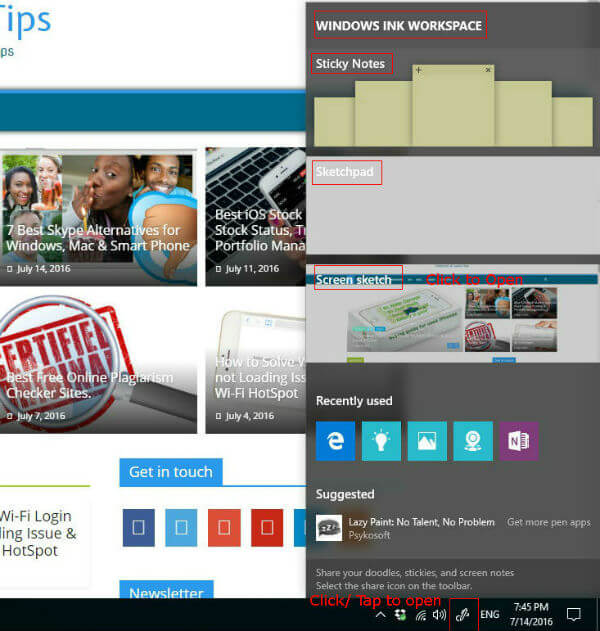
Once enabled, the Task bar will show a new icon which is for Windows Ink Work Space. We can click on this icon to see what are the options it is giving. A fly out menu will be coming which will be showing the options and recent apps from the Windows Ink Work Space.
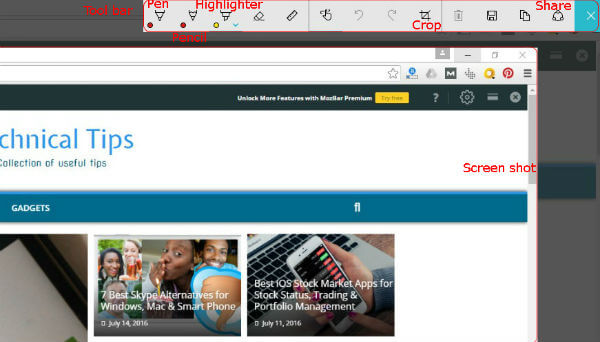
There are 3 options included in the Windows Ink Work Space as of now. They are Sticky Notes, Sketchpad and Screen Sketch. We may be familiar with the sticky notes and the usage of it from the previous versions of Windows. It can be used as a simple note taking utility, this time with Cortana integration. Sketchpad is the main utility here that will be used for hand writing input and drawings and it is mostly useful for Touch devices. We need to take “Screen Sketch” here which is useful to take screen shots in Windows 10 devices. Generally before opening the Screen Sketch, we need to keep open the Windows that to be taken Screen Shot. Screen Sketch will open with the present screen as an image canvas that can be useful for editing further on the captured screen. In this picture canvas, we will get the three familiar tools as in the Microsoft Edge Browser. Pen, Pencil and Highlighter with different colors that can be used to write, Markup, Highlight the required portions of the captured screenshot before saving it.
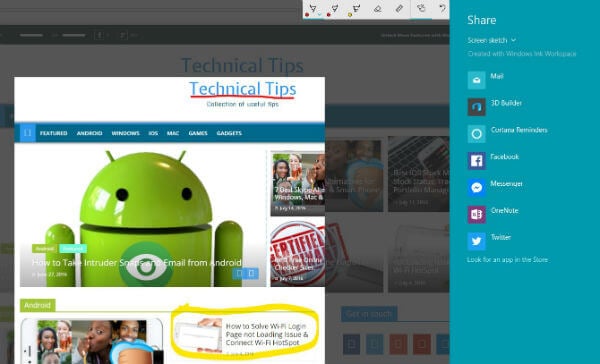
Screen Sketch also contains a Crop button to adjust the screenshot in required Height and Width. After cropping, we can use the standard Save, Copy or Share options to send the final screenshot to the destination from the same window. We may also discard the screenshot if we are not satisfied with the result by closing the image canvas.
With the use of Screen Sketch, the conventional processes like screen shot taking, opening for editing using any picture apps, editing, and sending the screen shot are simplified so much that everything can be done in a single window. Also it gives the additional option of save or discard without actually taking the screen shot in the Windows 10 device. We might have used PrintScreen option in keyboard for Desktop devices previously and Long press of Windows Home button and Volume Down button for Touch based devices to take screenshots that are going to be replaced with this easy utility in the coming Windows 10 Anniversary Update.
Δ


