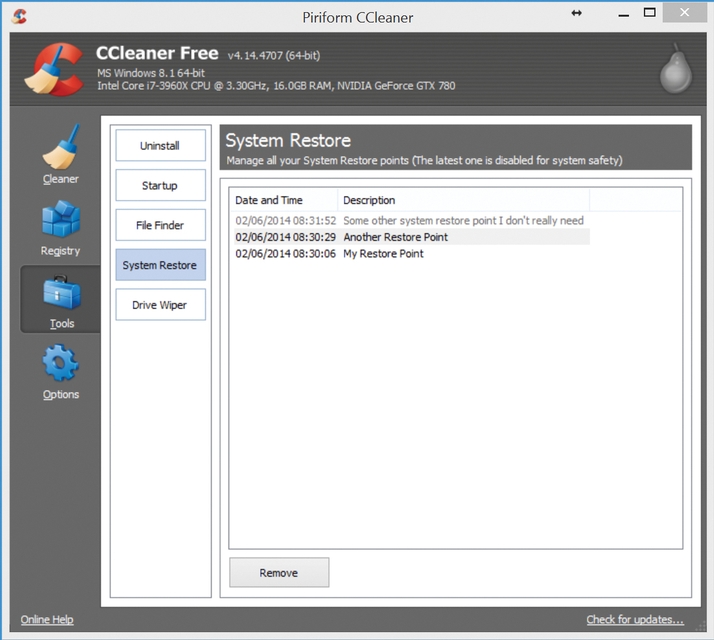
System Restore is one the most useful features of Windows. As part of Windows System Protection, it can resurrect a PC that’s stopped working, by returning it to a state when it was known to be working. These states are known as system restore points and can be created automatically during software installations or configuration changes, or manually by the user at any time. Also see: How to use System Restore to fix a Windows 8 PC or laptop However, these system restore points can contain a lot of data that could eventually start to fill up your system drive – especially if you have a lower capacity drive such as an SSD. Windows allows you to manage the maximum amount of disk space given over to system restore. Navigate to the ‘System’ control panel or press the shortcut Win+Break key combination. The click on ‘System protection’. Here you’ll see a list of drives and whether or not system protection is enabled on each. You can choose to enable to disable system protection on specific drives. We recommend enabling system protection on your system drive at least, as this is required for System Restore to work. Select a drive and click the Configure button to change the options. You’ll notice that you also have the option to delete all restore points for this drive. This will recover all the space used for system restore points, which is great if you’re running low on disk space. However, it’s an all-or-nothing option and it won’t allow you to keep specific restore points. If you want to delete only specific restore points, you’ll need to use a third-party tool. One tool that can do this is CCleaner (piriform.com/ccleaner). Install the program, run it and select ‘Tools’ from the column at the left. On the right-hand side, select ‘System Restore’. Now you can click on any specific restore point (except the most recent one) and click Remove to delete it, leaving the others intact.